Local GUI
Medix ships with an optional local web GUI: a Material Design interface that runs entirely on your machine and drives the same FFmpeg engine as the CLI. Files never leave your computer, there is no login, and nothing is uploaded anywhere.
Starting the GUI
Section titled “Starting the GUI”The GUI does not start automatically on install. It is a separate command,
medix-gui, that you run when you want it:
medix-guiThis starts a local server on http://127.0.0.1:8756/ and opens your default
browser. Press Ctrl+C in the terminal to stop it.
Options
Section titled “Options”| Flag | Default | Description |
|---|---|---|
--port | 8756 | Port to bind. |
--host | 127.0.0.1 | Host to bind. Keep it on localhost unless you know what you’re doing. |
--no-browser | off | Start the server without opening a browser. |
--version | Print version and exit. | |
--help / -h | Show help and exit. |
Run it on a specific port:
medix-gui --port 9000Start it headless (no browser pop-up), then open the URL yourself:
medix-gui --port 9000 --no-browserRunning it as a background daemon
Section titled “Running it as a background daemon”Instead of keeping a terminal open, you can run the GUI detached and manage it with subcommands:
medix-gui start # run in the background, prints the pid and portmedix-gui status # show whether it's running, with pid and portmedix-gui stop # stop the background processstart reads --host / --port from the group options, so to bind a specific
port: medix-gui --port 9000 start. The background server writes its logs to
gui.log and its process info to gui-daemon.json, both under your config
directory.
Auto-start at login (macOS)
Section titled “Auto-start at login (macOS)”To keep the GUI permanently available, install a launchd service. It starts at login, restarts if it crashes, and survives reboots:
medix-gui install-service # writes ~/Library/LaunchAgents/de.vinelabs.medix-gui.plist and loads itmedix-gui uninstall-service # unloads and removes itUse --port to pick the port the service binds: medix-gui --port 9000 install-service.
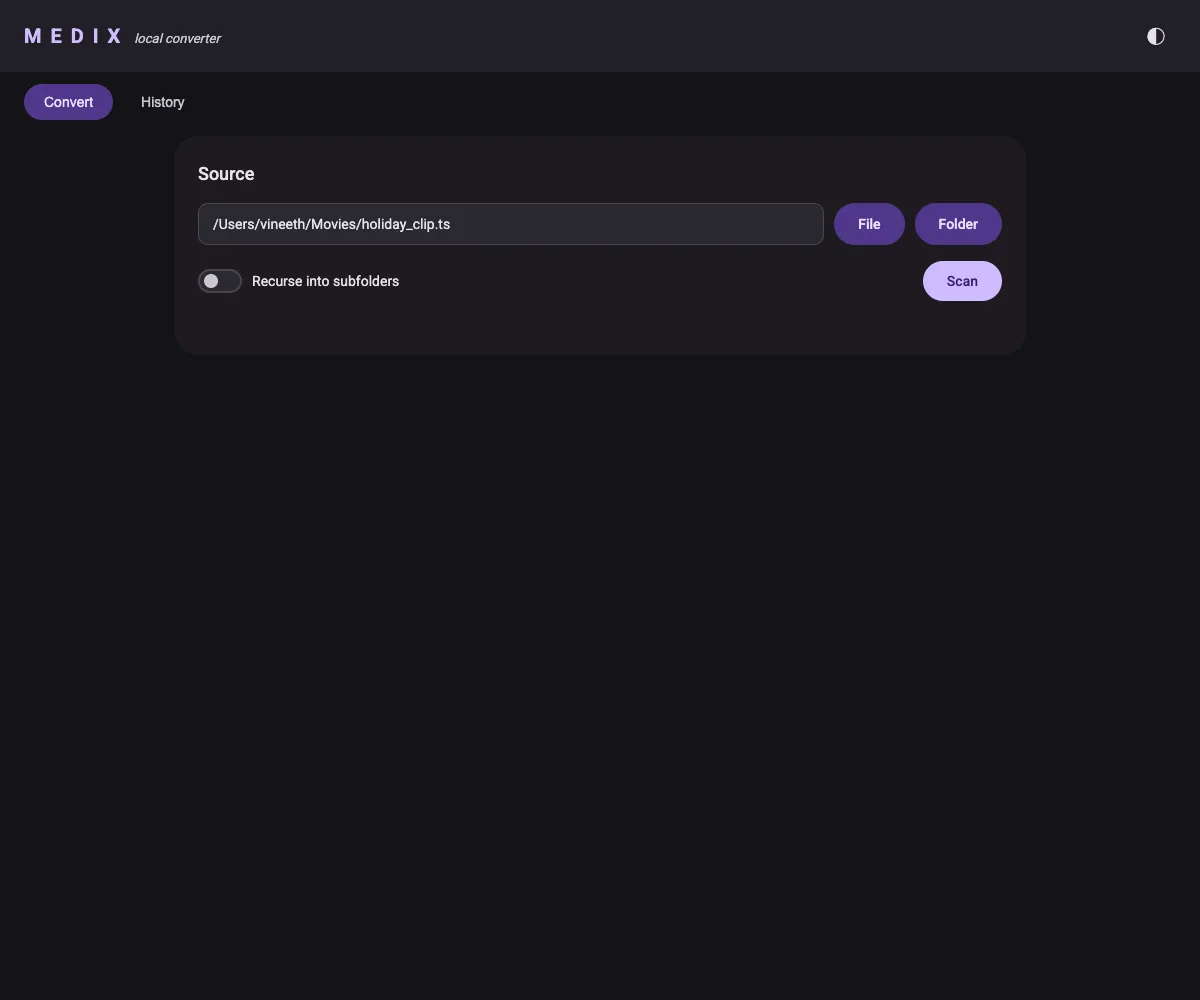
Pointing at your media
Section titled “Pointing at your media”Type or paste a path into the Source field, or use the pickers:
- File — choose a single media file.
- Folder — choose a directory. Toggle Recurse into subfolders to scan the whole tree.
Click Scan to discover media files. Medix probes each file with ffprobe
and lists them with type, resolution, duration, and size.
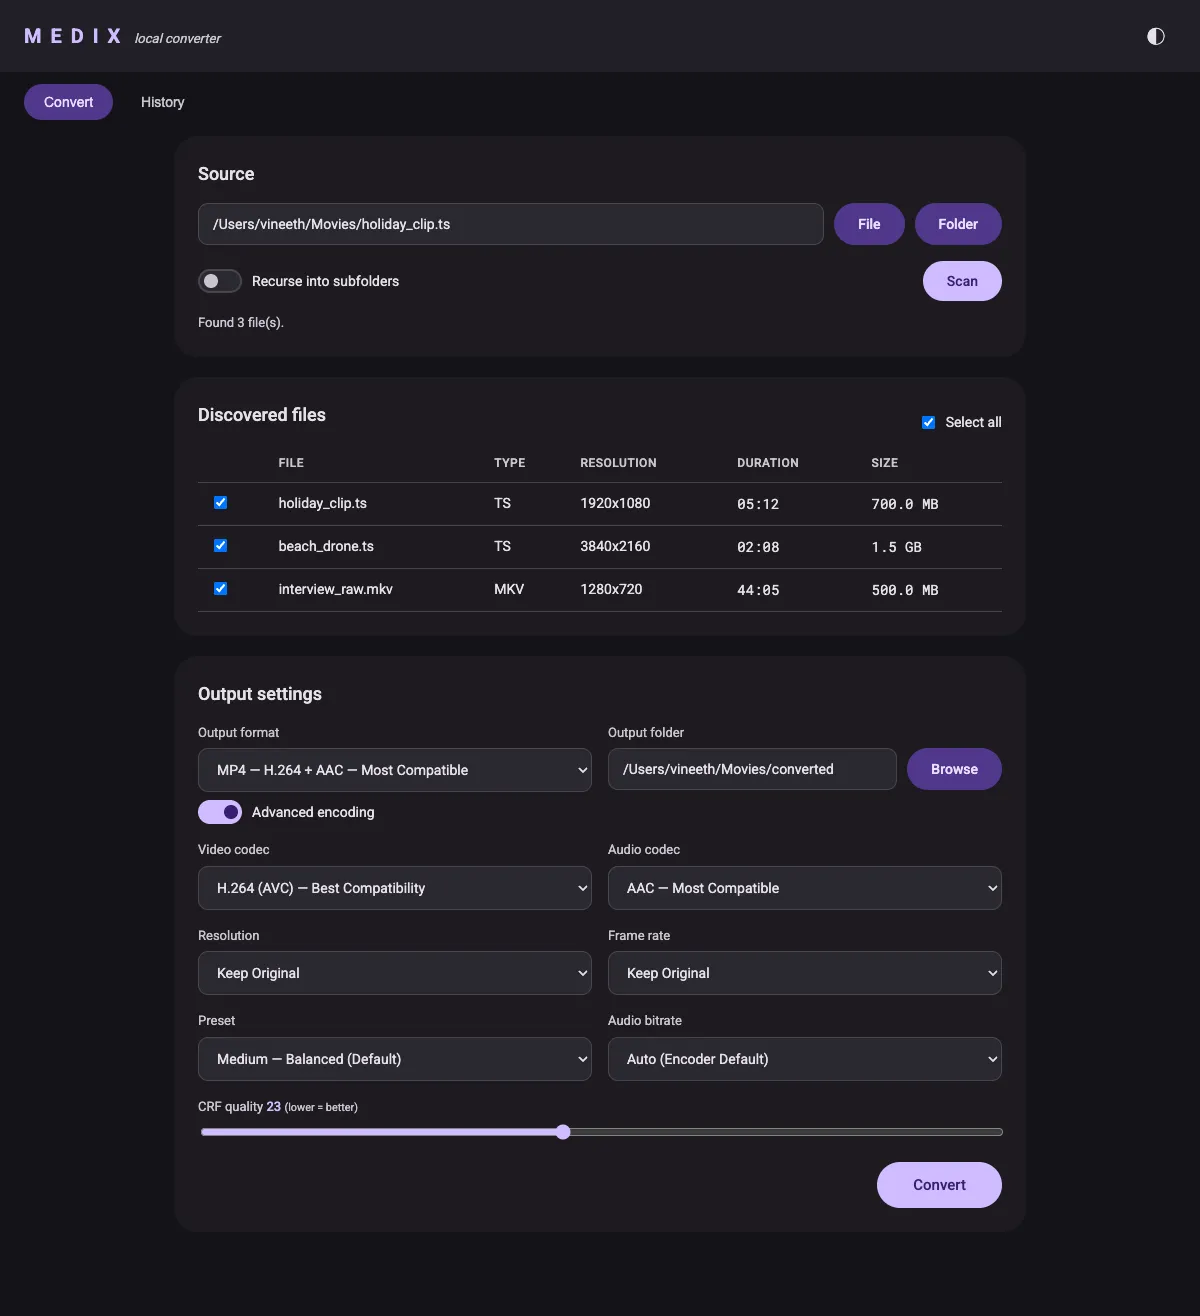
Uncheck any files you don’t want, pick the Output format, and set the
Output folder (it defaults to <input>/converted/, and has its own
Browse button). Flip on Advanced encoding to tune video/audio codec,
resolution, frame rate, preset, CRF, and audio bitrate, exactly like the CLI’s
advanced prompts.
Watching progress
Section titled “Watching progress”Click Convert and the progress card shows a live overall bar plus a bar per
file, streamed from the server as each file encodes. Status chips move from
QUEUED to ENCODING to DONE (or FAILED, with the error available).
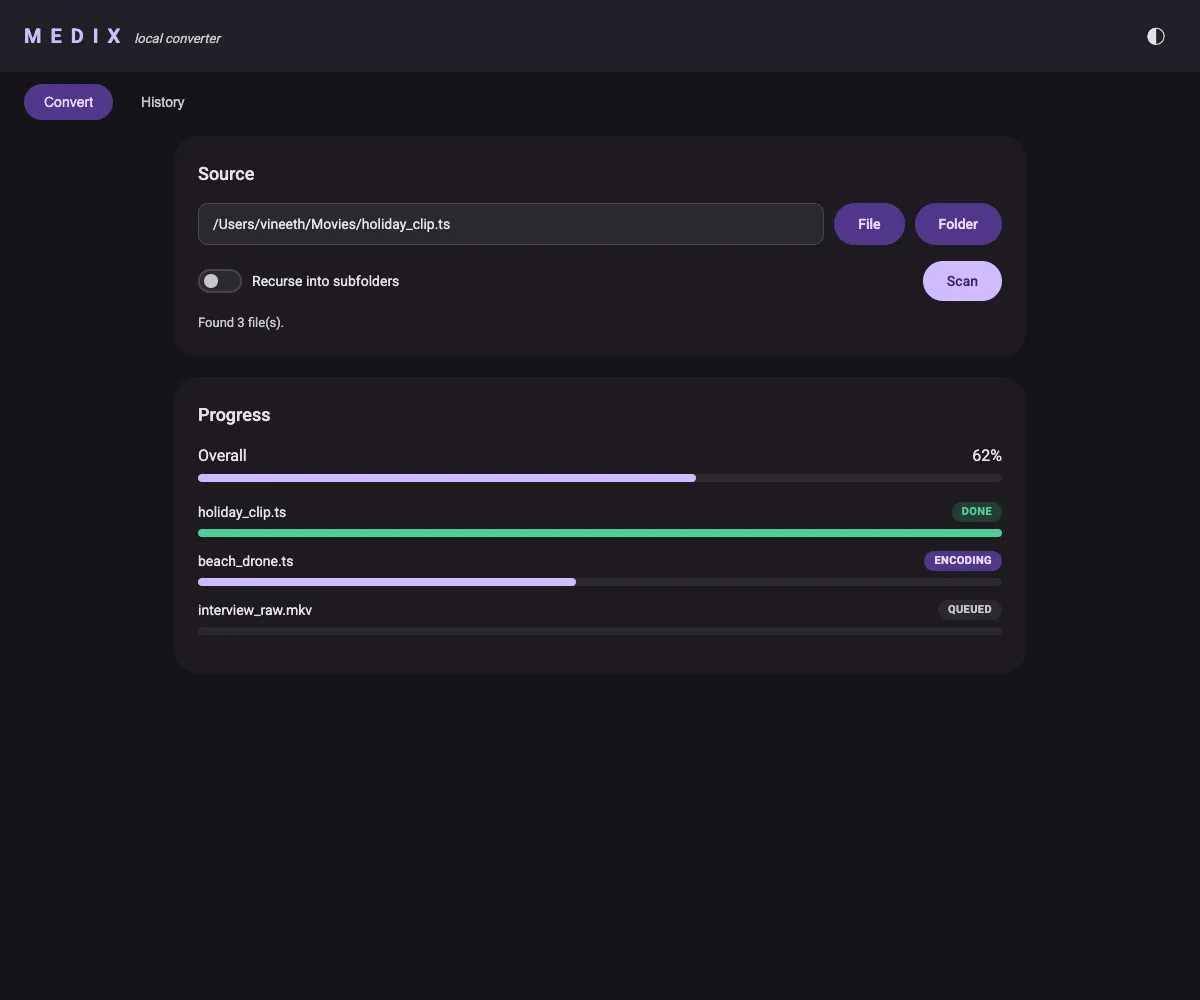
When everything finishes, a summary appears with the success/failure counts and an Open output folder button.
Conversion history
Section titled “Conversion history”Every conversion is recorded locally. The History tab lists past runs and lets you filter by time window: 24h, 7 days, 30 days, or All.
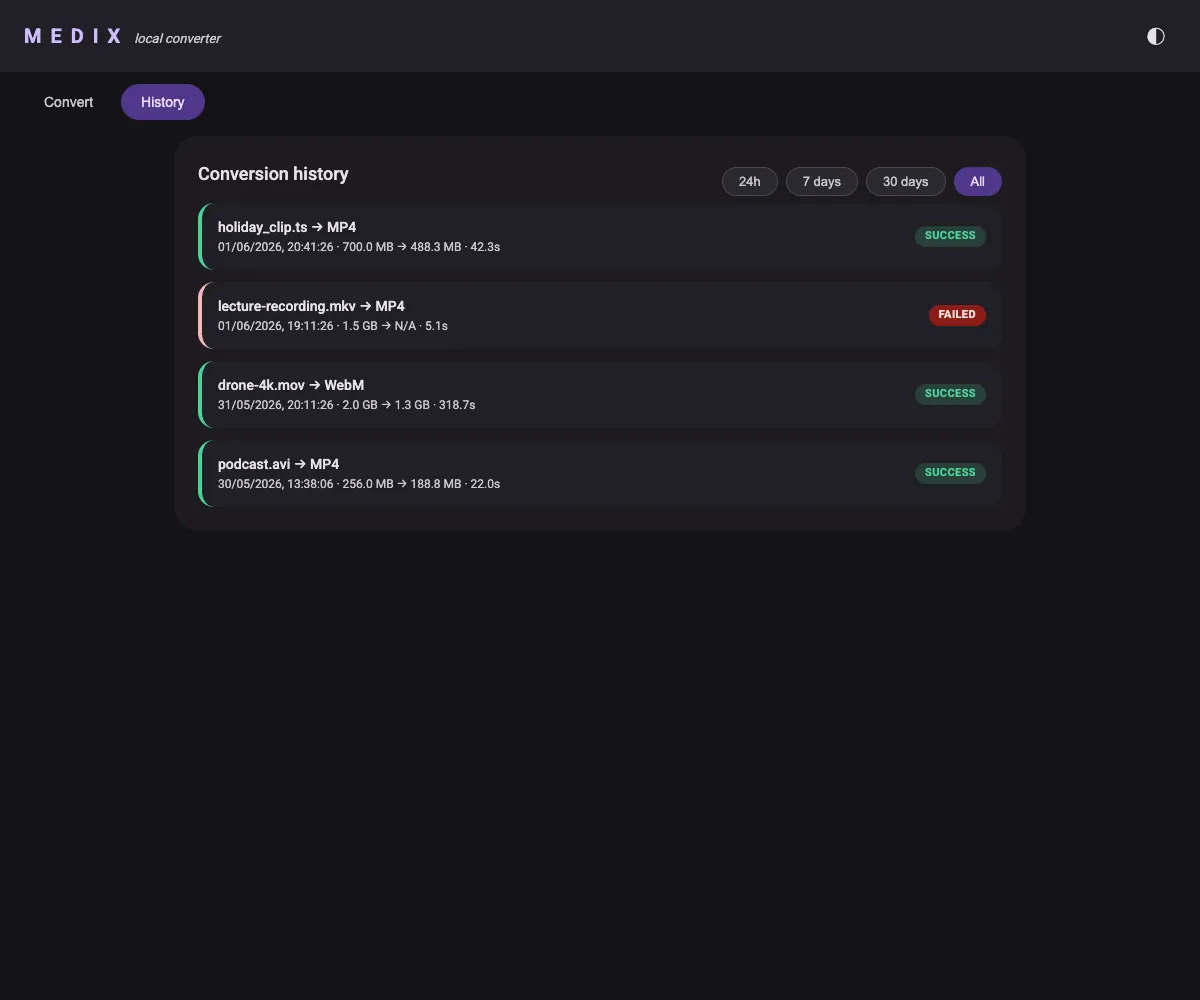
Each entry shows the input file, target format, input/output sizes, how long it took, and whether it succeeded. History is stored as a plain JSON file under your config directory:
| Platform | Location |
|---|---|
| macOS / Linux | ~/.config/medix/history.json (or $XDG_CONFIG_HOME/medix/) |
| Windows | %APPDATA%\medix\history.json |
You can override the location with the MEDIX_CONFIG_DIR environment variable.
Delete the file to clear your history.
CLI vs GUI
Section titled “CLI vs GUI”The GUI and CLI share the same engine and produce identical output. Use whichever fits the moment:
- CLI (
medix) — fast, scriptable, great over SSH. See CLI Usage. - GUI (
medix-gui) — point-and-click, live progress, and browsable history.